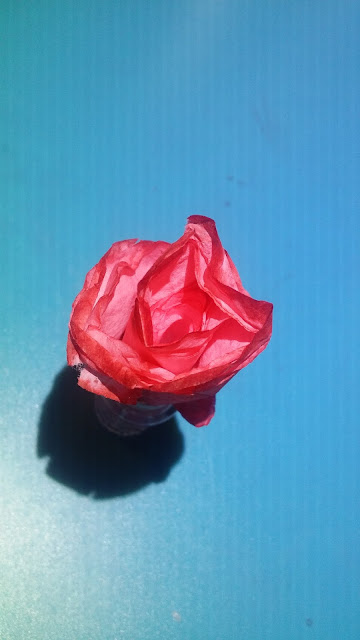
January blahs got you down? Cheer up, because you won't have to wait til spring to enjoy colorfull flowers with this very inexpensive and easy DIY using coffee filters and food coloring.
Hydrangea
Materials
16x Small coffee filters
2× Large coffee filters
Glue
Food coloring
Foam craft paper
1.5 inch diameter styrofoam ball
Wood Dowel or wood Skewer
1.Cut foam craft paper into a 3.5 inch diameter circle with small hole in center (approx same size as a hole punch)
-Mark 8 evenly spaced points around your circle about 1.5 inch from putter edge of cicle.
-Use an exact-o knife to cut X marks into craft foam paper.
Set circle aside
2. Mix food coloring and water to desired color saturation.
3. Prepare small coffee filters by folding in half and then again, resulting in a triangular shape.
4. Dip wide edge into food color and soak until filter has absorbed desired amount if tint.
Shake off excess water
This is what your filter should now look like.
5. Open filter up and line center over marks made on circle. Use the flat end of your dowel or skewer to push center of filter through foam pulling through and leaving approx 1/4 inch tip on backside.
Continue until around circle.
6. Use either hot glue or all purpose adhesive to bottom secure tips in place.
7. Mark 4 evenly spaced places on styrofoam ball
8. Mark 4 more places around center of ball. And one more on bottom side. Use end of dowels to punch holes at marks and place small amount of glue inside each hole.
9. Repeat step #5 by lining center of filter over punched holes and pushing through with flat end of dowell.
10. Use glue to attach ball to center of circle.
11. Mix green food coloring and water until desired tint. Repeat steps #3 - #4 using 2 large coffee filters.
12. Fold Large filters in half and then again to make rectangular shape.
13. Flip over foam circle and place green filters across backside
14. Place glue on end of dowel and push center of filters through foam circle into styrofoam ball.
Roses
Materials
4 X coffee filters
Food coloring
Floral wire
Floral tape
Glue
1. Mix food coloring and water to desired color saturation.
2. Fold one filter in half and the again and 1 more time, to make a triangle.
3. Use a small amount of glue at folder edge of triangle and adhere floral stem wire or dowel or toothpick
4. Roll triangle
5. Fold remaining 3 filters in slightly off center halfs and wrap each one around the first and secure in place with floral wire at base of flower head.
*Tip: for a more petal like result. Fold remaining 3 filters 3 times into triangles and trim filter with scissors at top. Unfold so they are halves again but so that cuts are not lined up, and wrap around center filter.
6. Dip flower head directly into food coloring mix or use a spray bottle to spritz on color, or even use a paint brush to tint filter to desired color. Use a toothpick to help separate and arrange the layers of petals. The coloring will naturally dry darker on the edges of the filters than centers.
*Tip: Using a "mister" that is for making your own olive oil spray found in kitchen goods stores for your food coloring application will give you an even and controlled light misting of color.
7. Once dry, use floral tape around base and wrap to desired bud/stem length. And arrange.
The look so real!
I have arranged mine on a small styrofoam ball and placed inside of this beautiful vintage crystal stemware found at ReStore for only $2.00!
Adding a few rose hips essential oil to your food coloring and water mix will add a fragrance to make them even more deceptive of their meager beginnings as simple coffee filters.
Want more proof as to how easy this DIY is? The pic below is a rose bud made by 6 year old son. (Who was grounded from his video game at the time and decided to entertain himself by crafting with mom)
This fun floral feat is guaranteed to melt away the gray wintery chill by adding color and life to your space without taking a chunk out of your wallet!
And why pay an exorbitant amount of money for real roses that only last a few short days this Valentines Day? Impress your mate with a heartfelt homemade gift that will last a lifetime!
Until next time
~Andrea


No comments:
Post a Comment