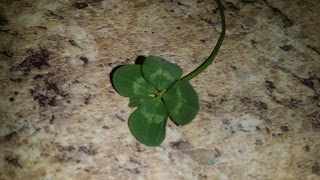
You have finally found a four leaf clover after years of searching through countless clover patches and want to preserve this tiny little illusive lucky charm forever.
You could flatten in a book. But if your like me, you would probably forget which book it's in until one day by happenstance, you open the right book up and it falls out on the floor and you think it's a spider and stomp on it crushing it into bits of little dry green flakes... (true story)
Or maybe you would like to suspend it in glass like acrylic and make it into a necklace charm... (also a true story and today's DIY tutorial)
* First, a little bit of personal info to needs to be shared before we start: I posses the super amazing (or annoying according to my husband) skill and ability to find multitudes of Four Leaf Clovers anywhere and anytime. I can even find them while just walking through the yard not even trying to find them. I started the project with 20 clovers I picked right before starting.
I have worked with all types of 2 part resin and acrylic mixes before in large scale for countertops and tables. So I figured that I would be able to use jewelry resin to accomplish my goal.
I rummaged around and got out the mixing cups and another tiny cup to use as a mold and prepared the resin according to instructions.
I poured a little in the mold just to cover the bottom and then used a toothpick to position it, then poured more of the mixture over the clover until it was covered up.
I precut my "mold cup" a bit to make it easier to remove the cured resin once it was done drying.
In full disclosure, I admit that I experienced a DIY fail with this project. And not just once, we are talking about the complete loss of 10 innocent four leaf clover lives while trying to get this to work. This is number 11. I systematically went through each step trying to figure out what I had been doing wrong and determined that it was several different factors... the jewelry resin seems to take longer to cure than what I am used to. There is also a "soft cure" and a "hard cure" time difference. I'm not exactly the patient kind of DIYer, so 24-72 is not only the number of curing hours, but is about also how many chances I will poke it or knock it over or accidentally get something in the drying mixture. I also needed mold release, but not just any brand or type worked, it needed to be the recommended brand in the instructions. I probably should have used the recommended brand specific molds too but I was getting a little flustered and about to throw the towel in when lucky number 11 finally came through acceptable enough. For all you patient types with no children or pets or husbands, this is the craft for you.
For the rest of us ADD crafters whose house can seem like a circus at times, I have a perfect alternative.
My husband has recently became what I call a "super nerd" and has taken up the hobby of building and flying RC planes and helicopters. (You would agree if you saw him rockin his FPV goggles that sort of resemble the head gear worn in some 90's movie about virtual reality video games) And even though I normally scowl as I walk pass my dining room table turned tiny little airport hanger, today I was super excited when I saw his glue left out on the table.
Meet the "Dream Team"
The purple labeled bottle is a super thick liquid super glue that dries crystal clear. The brown labeled bottle is a spray bottle that dispenses mists what can only be described as magic.
I applied a thin layer of glue to the surface of this metal button and used a toothpick to carefully position the clover.
Then I cover the button and clover completely with more glue. Then I spray the Insta-cure on it.
And POOF!! Like magic the glue is hard and crystal clear. It literally happens so fast that I don't even have a chance to snap a pic of the spray on the button.
The best part of this is that if your glue dome isn't perfect, you can use a fingernail file to sand it down and simply wipe with glass cleaner to make it shiny again. I finished the button off with a coat of clear top coat fingernail polish and a little bit of glitter fingernail polish around the edge because no project is complete without glitter.
Wishing you much Luck on all your DIY's!
Until next time
~Andrea


No comments:
Post a Comment